aubergine rigatoni

I adore aubergines. They’re so beautiful to look at, all plump and shiny and inky-purple, and I think they may be a little addictive – we had them twice last week, once in a lamb curry, and then again in this pasta dish. I urge you to make this – it’s so simple and comforting, writing this post has made me crave it again.

You need (for two people):
2 aubergines
1 red onion, chopped into eighths
1 red chilli, finely sliced (take the seeds out if you don’t want much heat)
1 bunch of basil
2 garlic cloves, crushed/minced
1 tin of chopped tomatoes
1 tsp balsamic vinegar
1 lemon
1 ball buffalo mozzarella, torn into inch-sized bits
Approx 140g rigatoni (penne would be good too)
Olive oil, salt, pepper and a pinch of sugar

Put the oven on, at 200 degrees. Chop the aubergines into inch cubes (roughly) and spread out on a baking tray. Drizzle with a little olive oil and pop in the oven for about 10-15 minutes – you want them to char a little round the edges. Roasting the aubergine first ensures that it becomes silky and tender – undercooked aubergine is a VERY WRONG THING.

Get the water boiling for the pasta in a big pan (make sure to add a good pinch of salt to the water), and heat a little olive oil in a frying pan on a medium heat. Add the onion to the oil and cook for about 5 minutes until softened, then add the garlic and chilli and stir everything round for another minute before you chuck in the chopped tomatoes. Mix the aubergine in with the tomato sauce, dribble in a little balsamic vinegar and season with salt and pepper. You might need to add a pinch of sugar as well, depending on the tartness of the tomatoes – taste and see. Turn the heat down to a low setting and let it blip away while you cook the pasta according to packet instructions. I used wholewheat rigatoni, which has a pleasing nuttiness that complements the smoky softness of the aubergine.

A couple of minutes before the pasta is done add a tablespoon of the pasta water, a squeeze of lemon juice and a handful of shredded basil to the aubergine sauce, and put the grill on. Drain the pasta, combine with the aubergine sauce and tumble into an ovenproof dish. Dot the mozzarella on top of the pasta and place under the grill for a few minutes. It’s done when the mozzarella has coloured slightly and collapsed into the sauce (buffalo mozzarella doesn’t go stringy when cooked, and is the perfect milky foil for the gentle heat of the chilli – regular mozzarella would be too cheesy in this I think).

Enjoy! (With a big glass of wine, obv)

spanish chicken

Now I’m not making any claims for authenticity here – this got its name simply because it has chorizo and paprika in it. It’s super easy to make and completely delicious. You will need (serves 2):

Chicken thighs (I normally allow 2 per person but cook extra as it’s lovely cold)
Chorizo – I use the Unearthed cooking chorizo chopped in half but any chorizo will do
1 medium to large potato per person, cut into smallish cubes
1 red onion, cut into eighths (medium chunks? I dunno, I always says eighths as Mike does all the onion chopping for me* and he likes precise instructions)
1 red and 1 yellow pepper (or 2 red, whatever you like really, but not green), cut to about the same size as the onion
3 garlic cloves
1 lemon
1 tsp smoked paprika
A small bunch of fresh oregano

Preheat the oven to 200 (or whatever the equivalent gas mark is). Put a sploosh of olive oil into a high-sided roasting dish and put in the oven to get hot. Toss the potato chunks in the paprika then add to the hot oil in the roasting dish. Make sure the potato is evenly spread out and then return the roasting dish to the oven for 10 minutes.

In a hot frying pan sear the chicken thighs, skin side down first, for a couple of minutes each side until they get a nice bit of colour (I don’t bother using any oil here). This is the stage where I always promise myself I’ll buy one of those fat splatter guard thingies, so you might want to stand back from the spitting pan a bit. Also, popping the extractor fan on might be wise. Add the chunks of chorizo and push around the pan for a minute or two.

Take the dish with the potatoes out of the oven and add the peppers, onion, chorizo and garlic (keep the cloves whole and unpeeled but squash them a bit with the flat bit of a big knife), tumble everything about a little, then lay the chicken thighs on top. Tuck a few sprigs of oregano in amongst the jumble of yummy things and squeeze the lemon over the chicken. Season the chicken with salt and pepper, top with a drizzle of olive oil and put in the oven for about 40-45 minutes.

Serve with a green salad and crusty bread for mopping. The bits around the edge in the picture might look a little burnt but trust me, they’re the BEST bits – make sure you snaffle them (chef’s perks).

* Because it really REALLY hurts my eyes, not cos I’m a lazy cow

smoked mackerel (sort-of) pilaf

Mike’s recent birthday week involved a large amount of rich food and lovely booze, so the one evening we spent ‘dry’ called for a dish rich in flavour AND nutritious stuff. This was just the ticket.

For 2 people you will need:
140g brown basmati rice
1 chicken/veg stock cube
2 smoked mackerel fillets (although there were 3 in the pack I used), flaked into bite-sized pieces
1 bag baby spinach
1 packet tenderstem broccoli
A few spring onions (4 will do), snipped into small bits with scissors
1 red chilli, sliced finely
Large handful of chopped parsley
1 lemon
1 small tub low-fat yoghurt
Freshly ground black pepper (I didn’t add any salt as the stock cube was already quite salty, but it’s up to you)

Mix the stock cube with water, and use that to cook your rice. I use the absorption method, which always works well for me – and I always stir with a fork, never a spoon.
While the rice is cooking (about 20 minutes) prep the other ingredients – cook the broccoli until tender but not floppy, chop the parsley, chilli and spring onions and flake the smoked mackerel. Add a small squeeze of the lemon and a pinch of the chopped parsley to the yoghurt (I do this in the yoghurt tub, no point creating more washing up), mix well and put in the fridge.
When the rice is cooked turn off the heat, then add the chilli, spring onions, broccoli, spinach (straight from the packet), and remaining parsley. Squeeze over the rest of the lemon and add a healthy grind of pepper, then mix it all together (with a fork!). Once it’s all evenly mixed add the mackerel, taking care not to break up the flakes too much.

Serve with a dollop of the yoghurt on the side.

This would work just as well with salmon, or even chicken. You can add whatever green veg you like – asparagus would be lovely. And you don’t have to stick to parsley – any combination of leafy herbs will do.

Caramel + peanut butter + chocolate = GOOOOD

A couple of weeks ago we had friends round for dinner. I made two curries (one prawn, one veg), so wanted something easy for pudding, and hit upon the idea of melting peanut butter into shop-bought caramel sauce to make a topping for vanilla ice cream. It was a roaring success. Attacking the leftover sauce with a spoon the following day – just like Nigella (ha!) – I noticed it had set into a pleasing squidginess. “Hmmm”, I wondered, “what would this be like in a tart with some chocolate on top?”. The answer? AMAZING. Here’s the recipe:

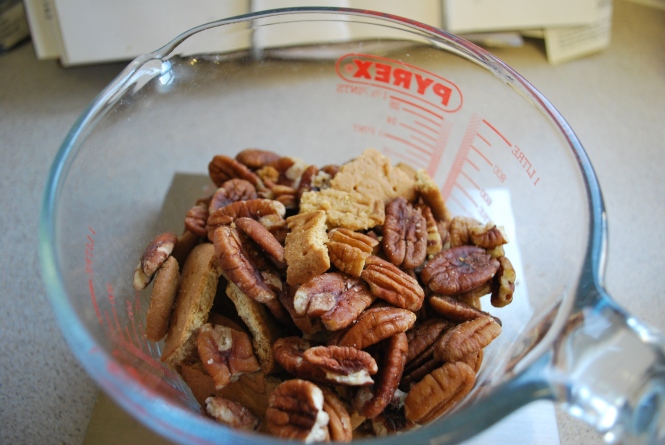
You need: A 20cm diameter loose-bottomed cake tin (non-stick, to prevent sweary moments); 1 jar of shop-bought caramel sauce – I used the Caramel Dipping Sauce from Waitrose (steer clear of any that are artificially sweetened); 2 tablespoons of crunchy peanut butter; 100g digestive biscuits; 20g nuts (I used pecans); 50g butter; 200g dark chocolate; 200ml double cream.

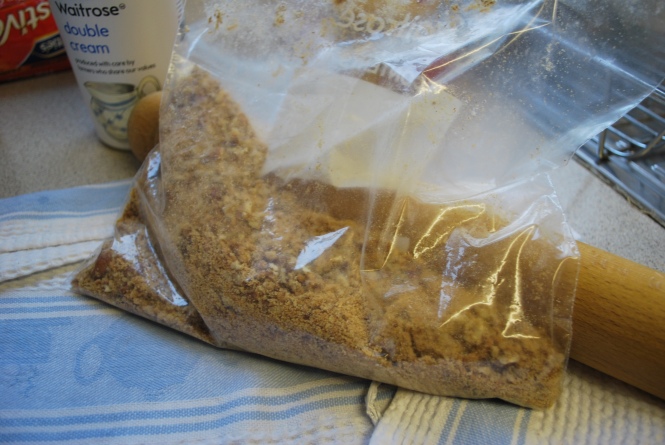
Step 1: Bash your biscuits (and your nuts. Fnar) – put the digestives and pecans into one of those closeable plastic bags, wrap in a clean tea towel and whack repeatedly with a rolling pin. This is immensely satisfying. Once you have something resembling the second picture below you can stop.

Step 2: melt the butter in a small pan, then stir in the biscuit and nut rubble and combine. Tumble the mixture into your cake tin and distribute evenly – a potato masher did this very effectively. Pop the completed base into the fridge to firm up.

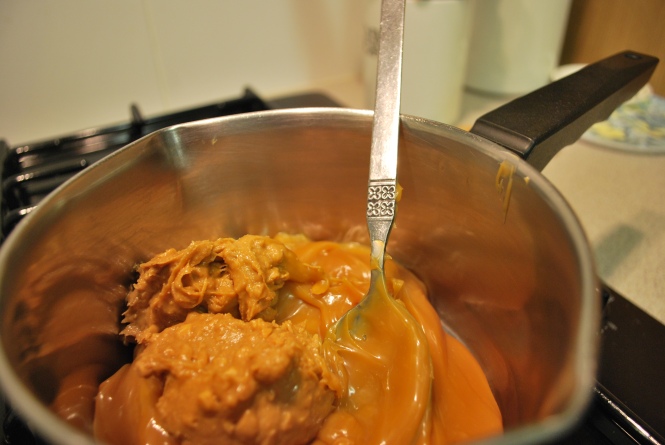
Step 3: Melt the caramel sauce and peanut butter together on a low heat – it really doesn’t take long, you just want them to combine smoothly.

Step 4: Once it looks like the picture above remove it from the heat and leave to cool slightly – it shouldn’t be too hot so this should only take 5 minutes. Take the base out of the fridge and pour the nutty caramel over, making sure to smooth it out to the sides of the tin. Put it back in the fridge.

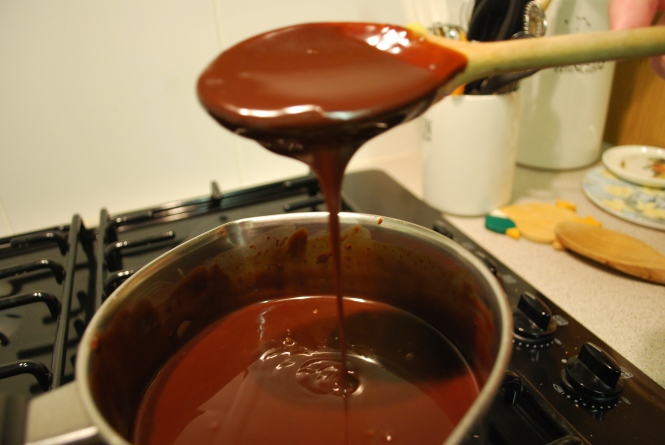
Step 5: Break up the chocolate into small pieces – I left it in the packet and used the rolling pin again – and melt it into the double cream. Do this over the lowest heat possible and DO NOT LET IT BOIL (if it boils it’ll go all grainy and that’s just horrible). You want it to be all smooth and glossy – once all the chocolate has melted take it straight off the heat and leave to cool for 10 minutes.

Step 6: Take the tart out of the fridge and pour the melted chocolate on top of the caramel. If you’re a complete perfectionist you can smooth out the little air bubbles – I just gave it a jiggle. Return the tin to the fridge – I made this on Saturday afternoon and we had it after Sunday lunch, but I think a couple of hours in the fridge would probably be enough.

Step 7: Remove from the fridge and gently loosen the sides with a palette knife dipped in hot water before pushing up the base to release the finished tart. Pop onto a serving plate before dividing into portions. Then eat! We had it with creme fraiche, which has the right sharp kick to balance the rich sweetness of the tart. I can’t describe in words how good it was – the first spoonful made me swoon. Plus it was so easy! I URGE you to make it – it’s just perfection on a plate.